ScopesAndAmmo.com Store Logo

+ Reply to Thread
Page 1 of 2 12 LastLast
Results 1 to 10 of 16

Thread: My 2260/M-Rod/AR2078LE Frankengun

  1. #1
    Senior Member sholo's Avatar
    Join Date
    Sun Jan 1 2012
    Location
    Slightly north of "out there"
    Posts
    354

    My 2260/M-Rod/AR2078LE Frankengun

    My poor ol' gun has gone through enough transformations, I think it has an identity crisis now!

    It started out as a bone stock 2240 I purchased from Eric, but who keeps a 2240 *stock*, right?... I left it original just until I gathered up some parts for "phase 1" (which was supposed to be the only phase, btw...) Parts included:

    steel breech (with 3 barrel set screws instead of just 1)
    24" barrel
    2260 tube
    Disco valve (modified)
    Disco fill adapter
    Disco hammer spring
    MuzzleMack extended valve cap
    Crosman shoulder stock
    13 ci bottle regulated @ 1500 psi
    Leapers 3-9x40 illuminated Mil Dot
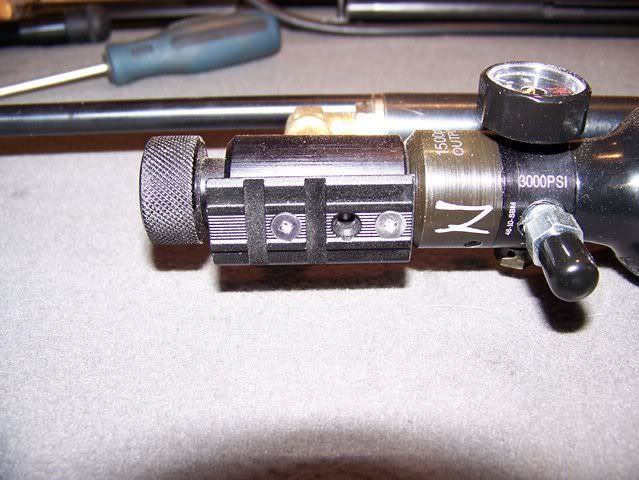
    couple of home brewed pieces - PA, shroud (cosmetics only), extended probe, bracket for rear of bottle.

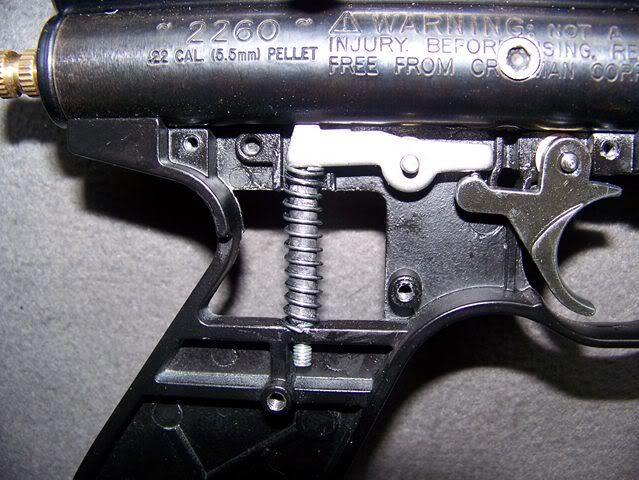
    If it wasn't for the 22xx trigger, I probably would have left it alone. I did the usual shim and polish procedure, lighter spring with guide/overtravel stop. I even did the ball bearing-on-the-lobe mod, and although it was substantially better than stock, it was still a single stage trigger with room for improvement:


    So...I got myself an M-Rod rifle trigger group and installed it, using low profile 8-32x3/8" SHCS's. ...OMG! I should have just done that from the start! By FAR the best trigger out of all my guns. Fully adjustable, and the 2nd stage breaks like glass. Highly recommended...The only thing with this trigger group is that you have to change the stock as you can no longer use the 22xx grip frame (unless you opt for the P-Rod trigger, and change/modify your hammer) Disco stock is a perfect fit, but I went a different route...
    First, a pic of the installed trigger (no modifications needed, direct bolt-on)


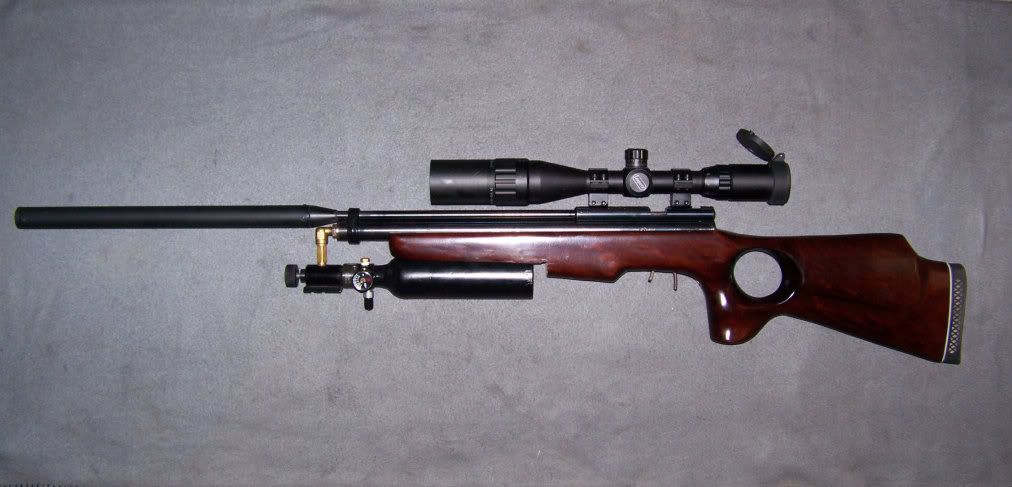
    I had an AR2078LE, so I purchased an "A" stock for it, and fitted the LE (thumbhole) stock to the 2260. All that was needed for it to work was to widen the slot for trigger by 1/8", and a bit of inletting so the top of trigger group sat flush with bottom of tube, as well as drilling a new hole for the stock mounting bolt. I also cut/shaped the forestock to accomodate the 13 ci bottle. By the time I had this done, I managed to put enough scratches/dings in the stock that I decided to sand it down to bare wood and re-stain. I ended up using Tung oil and Minwax "230 Early American" stain (all I had on hand), followed by 2 coats of semi gloss Diamond Wood Finish Varathane. It came out looking alright - albeit a bit *shiny* for semi gloss.

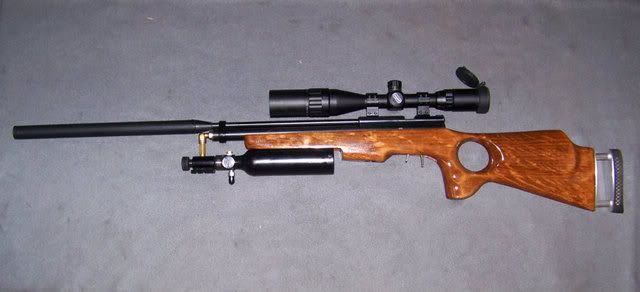
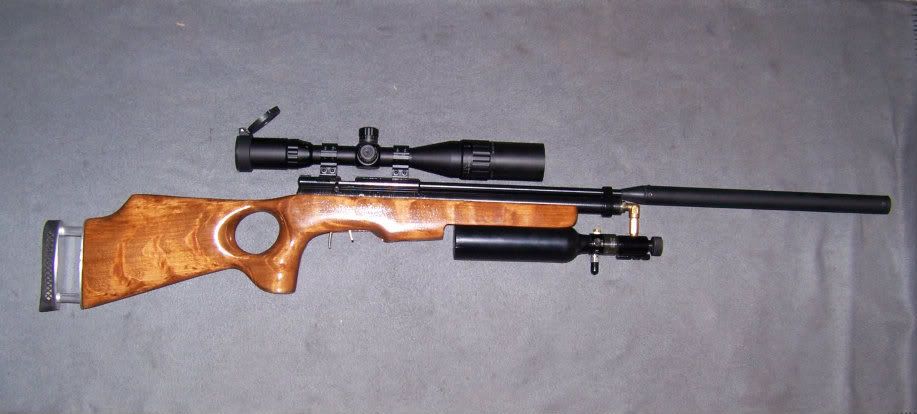
    Before and after pics:


    Yeah, I know - it looks a little goofy with the 3/4" space between end of bottle and stock , but seeing as front part is pretty much permanent, this is the only way I can remove bottle if/when I ever need to. Maybe I will cut a piece from the chunk I cut out of the stock and make a removeable block so it looks better ... Other than that, I'm pretty happy with how it turned out, even if it was a lot of work just to upgrade the trigger! Worth it IMO, though...

    Sorry for the long-winded post, hope you enjoy!

    Todd
    Todd

    Don't sweat the petty things, and don't pet the sweatty things!

  2. #2
    Senior Member SeanMP's Avatar
    Join Date
    Thu Dec 22 2011
    Location
    Just south of "Out There"
    Posts
    911
    Woah!

    Dude...That thing is outta hand!

    Very very nice custom gun. You should be thrilled. How does it shoot?
    Sean

  3. #3
    Senior Member sholo's Avatar
    Join Date
    Sun Jan 1 2012
    Location
    Slightly north of "out there"
    Posts
    354
    Thanks, man!

    It's not even close to the same quality of stuff you guys are doing, but I'm happy with it. That "gap" is really bugging me. Pouring rain out today, so I'm going to remedy that (besides, I like filling gaps... )

    She shoots pretty good. With the PA cranked in, it shoots 16 gr Polymags @ 955-960, 14.66 gr H&N FTT's @ 985, but only getting about 20-25 shots. I currently have it set @ 2.5 turns out and am getting (IIRC) 45-50 shots @ 920-925 with Poly's. Plenty for a day of squirrel/rabbit hunting. At 25 yards it will put 10 shots into a ragged one hole, easily covered by a dime. At 50 yards it's about 3/4" (benchrested, of course) and blows through 3/4" plywood like it's not even there.

    Todd
    Todd

    Don't sweat the petty things, and don't pet the sweatty things!

  4. #4
    Moderator rsterne's Avatar
    Join Date
    Wed Dec 7 2011
    Location
    Coalmont, BC
    Posts
    1,266
    Very nice job!!!.... Is that a Weaver rail on the bottom of the Paintball valve?.... How did you attach it, drill & tap?.... I machine that into my custom reversed tank blocks and love it.... I assume you're using pipe fittings that are good to at least 2000 psi working pressure and a 1.8K burst disc on the regulator?.... The reason I ask is that the pipe nipple looks like just a thinwall 1/8" NPT you might find in a hardware store.... The tank has a lot of leverage, and it might be a good idea to use stainless hydraulic fittings instead of brass?....

    EDIT: you need to start backing off the power adjuster while shooting through your Chrony.... You will find that above a certain setting the velocity won't increase all you are doing is wasting air.... Tune it to where it "just" falls off the plateau for vastly increased shot count....

    Bob
    Dominion Marksman Silver Shield - 5890 x 6000 in 1976, and downhill ever since!
    Airsonal: Too many to count!

  5. #5
    Senior Member SeanMP's Avatar
    Join Date
    Thu Dec 22 2011
    Location
    Just south of "Out There"
    Posts
    911
    I know Todd has been shopping at Swagelok a lot. In which case they are rated to 689 Bar on fittings and 344 bar for nipples
    Sean

  6. #6
    Senior Member sholo's Avatar
    Join Date
    Sun Jan 1 2012
    Location
    Slightly north of "out there"
    Posts
    354
    Thanks, Bob.

    Yes, it is a Weaver/Dovetail combi-rail I purchased from Eric quite awhile ago: http://scopesandammo.com/storefront/...mbi-rail-p-495 Cut it to length, drilled/tapped, and used S/S 6-32 screws with red loctite to attach. The front screw is only in far enough for a few threads to catch, being carefull that I didn't drill right through into the air passage of the valve. Back screw was cut to length so it wouldn't interfere with threads/O-ring on bottle.


    Actually, it was YOUR reverse tank block that I (somewhat) copied (haven't sent your Royalty cheque out yet, though...). But, not having a lathe/milling machine (or the know-how to use either one), this is what I came up with.

    As Sean stated, the fittings are all from Swagelok (only place I get my fittings now), and pretty beefy. But, I hear ya - next time I purchase fittings, they will ALL be S/S. And yes, there is a 1.8k burst disc on downstream side of reg.

    Crappy Tire one on left, Swagelok on right:


    I realize it's not an ideal setup - especially in the visual department - but hey, it don't leak, it is very rigid (no movement at all), and shoots hard and accurate. For a guy with limited tools and funds, it's about all I can ask for!

    Todd
    Last edited by sholo; Sep 08 2012 at 12:09 PM.
    Todd

    Don't sweat the petty things, and don't pet the sweatty things!

  7. #7
    Moderator rsterne's Avatar
    Join Date
    Wed Dec 7 2011
    Location
    Coalmont, BC
    Posts
    1,266
    Looks fine with those fittings.... Try backing off the hammer spring preload and let us know if your shot count improves....

    Bob
    Dominion Marksman Silver Shield - 5890 x 6000 in 1976, and downhill ever since!
    Airsonal: Too many to count!

  8. #8
    Senior Member sholo's Avatar
    Join Date
    Sun Jan 1 2012
    Location
    Slightly north of "out there"
    Posts
    354
    Well Bob (and anyone else who has an idea), here is a bit of trivia for ya:

    I just got the rifle completed a few days ago and posted pics. Been busy, so I didn't have a chance to test it all out 'till last night after dinner. Was going to shoot some strings at various PA settings and post results as you requested...

    The fps numbers I quoted earlier was with the 22xx grip frame configuration. I figured seeing as I was only changing trigger/stock, nothing internal, it wouldn't be misleading info - WRONG!! It is now slower @ coil bind than it was @ 2.5 turns out before!...

    22xx trigger @ just shy of coil bind - 955
    M-Rod trigger @ same (coil bind) - 914
    At 2.5 turns out, 22xx trigger was 925, while the M-Rod at 1 turn out was 875!!! Same pellets used in both cases (16 gr Polymags)

    Would I be correct in assuming that the sear is dragging on the hammer as hammer is released, thus slowing it down? I think I remember you (?) saying that you removed the "lawyer" spring from trigger group - something I didn't do...

    When I get home from work tonight I'll take stock/trigger group off, put the 22xx trigger frame back on and take a few shots to compare before I start fiddling elsewhere.

    Thanks for now,
    Todd
    Todd

    Don't sweat the petty things, and don't pet the sweatty things!

  9. #9
    Moderator rsterne's Avatar
    Join Date
    Wed Dec 7 2011
    Location
    Coalmont, BC
    Posts
    1,266
    Did you change the hammer when you changed the trigger group?.... The MRod and PRod use a hammer that is flat on the bottom, without the "waist".... I have heard of people breaking the sear on an MRod trigger from the secondary impact of the rear shoulder of the waist on the sear.... I had that happen on my Hayabusa, which had a waisted hammer, but have not used an MRod trigger on a Disco/22XX "yet".... People are either filling the narrow area in the hammer with JB Weld, or replacing the hammer with one from a PRod or Challenger.... I think Eric carries them.... You should also be able to grind a groove in the bottom of the hammer so that the sear can't touch the hammer after it's initial release.... I had to make that mod on a PCP where I had shortened the valve stem to increase hammer travel, and the hammer was hitting the sear even with a stock Disco trigger....

    Bob
    Dominion Marksman Silver Shield - 5890 x 6000 in 1976, and downhill ever since!
    Airsonal: Too many to count!

  10. #10
    Senior Member sholo's Avatar
    Join Date
    Sun Jan 1 2012
    Location
    Slightly north of "out there"
    Posts
    354
    No, I didn't change the hammer . For some reason I was under the assumption that only the P-Rod required the JB Weld trick. That would explain the lower velocities.

    Not a big deal, though. At least I now know what the problem is

    If I was to cut a notch/groove in the rear portion of hammer, would the JB Weld filler still be needed in the waist? I'm guessing no? Or would the extra weight (albeit small) of the filled waist be an advantage as opposed to lightening the hammer by cutting said notch?

    Thanks for the info, greatly appreciated!

    Todd
    Todd

    Don't sweat the petty things, and don't pet the sweatty things!

+ Reply to Thread

Similar Threads

  1. New Parts for my 2260 & 2560 HPAs
    By rsterne in forum Co2 and Pre-Charged Pneumatic (PCP) guns.
    Replies: 18
    Last Post: Nov 23 2012, 04:28 AM
  2. Tethered 2260 HPA less Stock
    By rsterne in forum For Sale
    Replies: 3
    Last Post: Mar 16 2012, 09:21 PM
  3. New 2260 on HPA
    By rsterne in forum Co2 and Pre-Charged Pneumatic (PCP) guns.
    Replies: 11
    Last Post: Feb 28 2012, 08:55 PM
  4. 2260 pcp
    By rsterne in forum For Sale
    Replies: 5
    Last Post: Feb 09 2012, 08:10 PM
  5. 2260 Carbine
    By paddyfritz in forum Airgun Picture Gallery
    Replies: 7
    Last Post: Feb 06 2012, 09:40 PM

Posting Permissions

  • You may not post new threads
  • You may not post replies
  • You may not post attachments
  • You may not edit your posts